
Set up card payments with Stripe
YourADI is free for instructors. To let students pay for lessons online, you connect your own Stripe account, once. This guide goes through every screen, from Settings in YourADI to the green Ready.
Before you start
Have these to hand:
- your mobile phone, for two-step authentication;
- your date of birth, and your home address with its Eircode;
- the IBAN of the bank account you want to be paid into.
In a driving school, the school owner sets up Stripe once for the whole school, and every card payment goes to the school's account. Billing & Payments is only on the owner's account: managers and instructors in the school have nothing to set up.
What it costs
YourADI is free for instructors. Students pay YourADI's €1 platform fee at checkout, on top of your price. In your Stripe Dashboard it shows on each payment as an application fee, which Stripe passes to YourADI. Stripe takes its own card-processing fees from each payment before it pays you out. Some options on Stripe's own pages cost extra, such as the paid fraud protection levels in step 7. Those are Stripe's prices, charged by Stripe, and only if you choose them. Stripe selects some options for you in advance, so read each page before you press its main button.
1. Start in YourADI
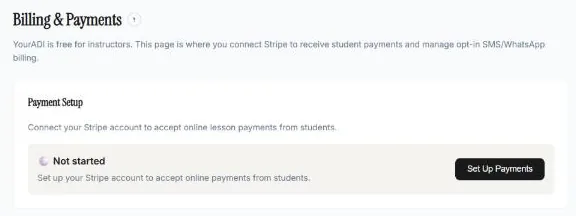
In YourADI, open Settings → Billing & Payments. Under Payment Setup it says Not started. Press Set Up Payments, and YourADI opens Stripe's secure setup pages.
2. Your email and a Stripe password
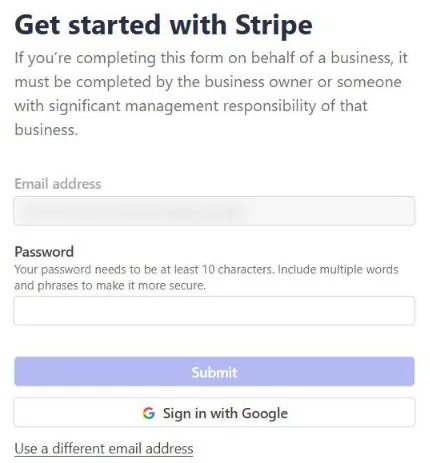
Stripe fills in the email address from your YourADI account. To use a different one, choose Use a different email address. If you already use Stripe with this email address, Stripe may ask you to sign in instead. Either way, YourADI sets up a new Stripe account for your YourADI payments, with its own settings: it doesn't change or reuse an account you already have.
Then create a password for Stripe, at least 10 characters long, or use Sign in with Google. This password is for Stripe only; it doesn't change how you sign in to YourADI.
3. Two-step authentication and your backup code
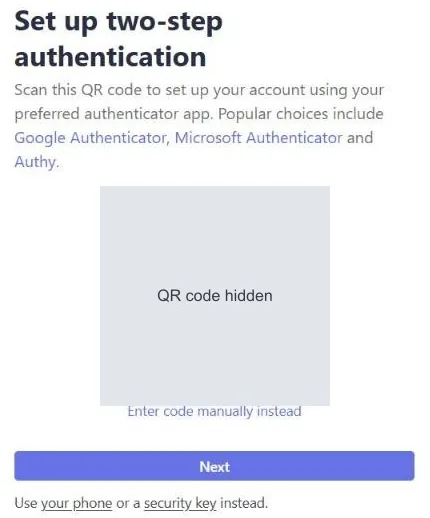
Stripe adds a second step to keep your account safe. Scan the QR code with an authenticator app, such as Google Authenticator, Microsoft Authenticator or Authy, then type in the code the app shows. If you'd rather not use an app, the links under the Next button let you use your phone or a security key instead.
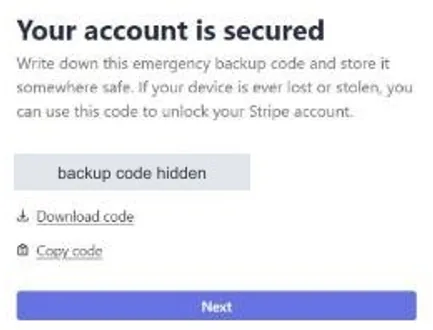
Stripe then shows an emergency backup code. Download it or write it down, and keep it somewhere safe, away from your phone: if your phone is ever lost or stolen, the backup code is how you get back into your Stripe account. Don't share it with anyone.
4. Your personal details
Next, Stripe asks who you are:
- your legal name, as it appears on official documents such as your passport;
- your date of birth;
- your home address, with the county and Eircode;
- a phone number;
- whether you're a citizen of Ireland, which Stripe says helps it decide which ID document to ask for.
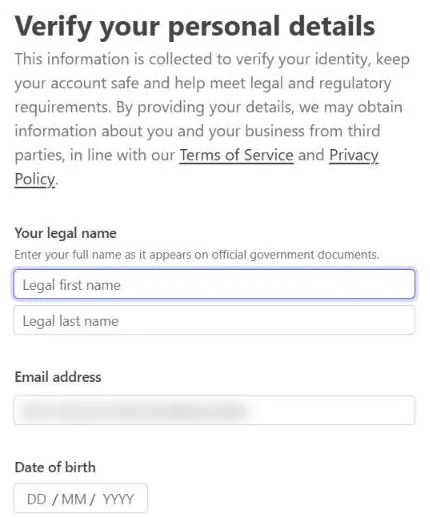
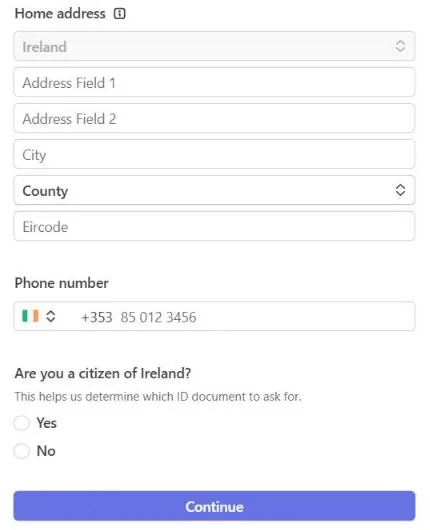
Why Stripe asks. Payment companies like Stripe must check the identity of the people they pay money out to: the law requires it, to stop fraud and money laundering. So Stripe can't pay you until it has checked who you are. You give these details to Stripe, on Stripe's own pages.
On a live account, Stripe may also ask for a photo of an ID document, such as your passport or driving licence, during setup or later on. If Stripe needs something after you've finished, it contacts you itself, by email or in your Stripe Dashboard. If it pauses your payments or payouts until you reply, YourADI's Billing & Payments page says Action needed, with a Complete Requirements button that takes you back to Stripe.
5. The bank account for your payouts
Add the bank account Stripe pays your money into: the currency is euro (EUR) and the country Ireland. Type your IBAN twice; you'll find it in your banking app or on a bank statement.
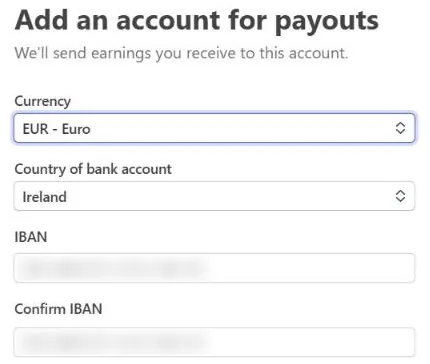
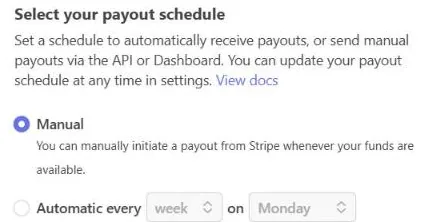
Then choose when Stripe sends the money to your bank:
- Manual: the money stays in your Stripe balance until you send it to your bank yourself, from your Stripe Dashboard.
- Automatic: Stripe sends it to your bank on a schedule you pick, for example every week on a Monday.
When we took these pictures, Stripe had already selected Manual. With Manual, nothing reaches your bank until you send a payout yourself from your Stripe Dashboard. If you'd rather Stripe sends your money to your bank by itself, choose Automatic before you continue. You can change the payout schedule later in Stripe.
6. What students see: statement descriptor and support phone
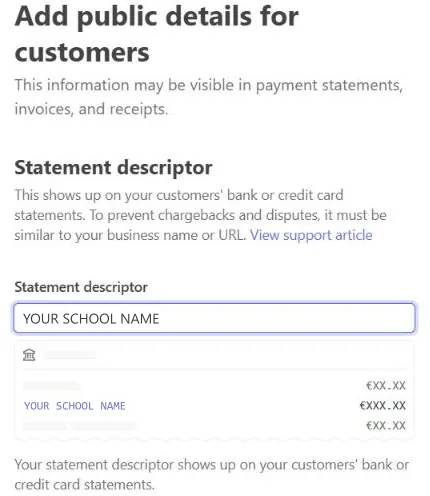
The statement descriptor is the name students see on their bank or card statement after paying you. Stripe fills it in from your business name in YourADI, and says it must be similar to your business name so that students recognise the payment. A shorter version is optional.
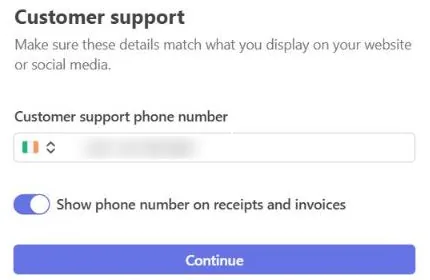
Then add a customer support phone number, for students with a question about a payment. With the switch on, Stripe shows it on receipts and invoices.
7. Fraud protection
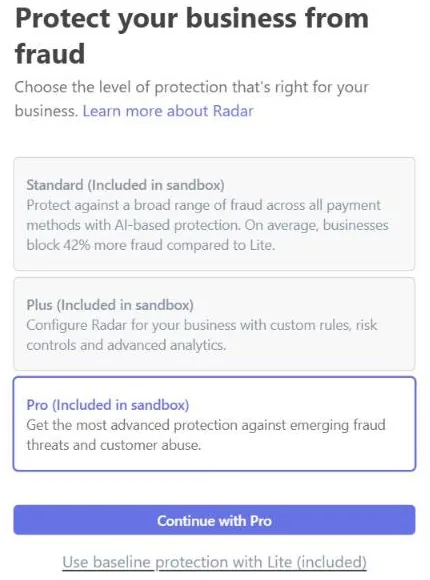
Stripe then asks you to choose a level of fraud protection (Stripe calls it Radar). The choice is yours. These are the options, as Stripe describes them:
- Lite: AI-based fraud prevention for card payments and card testing, plus fraud alerts. Stripe says it's included at no additional charge for businesses on its standard payments pricing. To choose it, press the link Use baseline protection with Lite (included), under the button.
- Standard: AI-based protection against a broad range of fraud across all payment methods, plus fraud analytics.
- Plus: lets you configure Radar yourself, with custom rules, risk controls and advanced analytics.
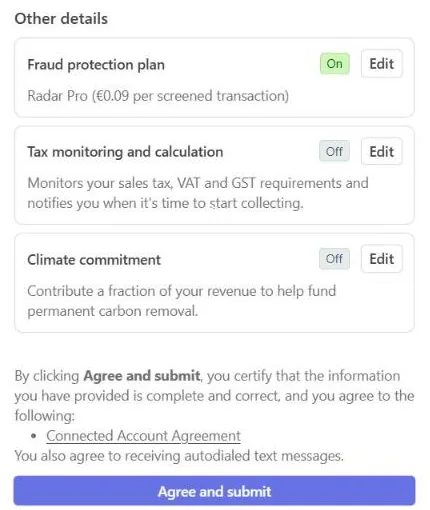
- Pro: Stripe's most advanced protection, against emerging fraud threats and customer abuse. When we took these pictures, Pro was preselected: the button said Continue with Pro. On 8 November 2026 Stripe's review page gave its price as €0.09 per screened transaction, which Stripe waives in test mode and charges on a live account.
Lite is included; Standard, Plus and Pro are paid levels. Stripe's Radar pricing page (opens in a new tab) lists their prices: on 8 November 2026, for businesses, monthly plans starting at €10 (Standard), €14 (Plus) and €19 (Pro), or pay as you go. Stripe sets those prices and charges them, not YourADI, and they may change. Before you submit, check the level and its price on Stripe's review page (step 9). If you finish on a paid level, Stripe charges for it until you change the level, which you can do later in your Stripe Dashboard.
8. Climate and Tax (optional)
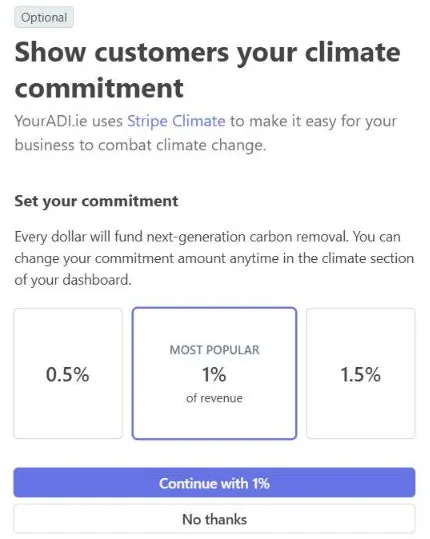
Stripe Climate gives a share of your revenue (0.5%, 1% or 1.5%) to carbon removal. It's optional and up to you. Stripe preselects 1%, and the main button, Continue with 1%, signs you up at 1% of your revenue. To take part at another rate, pick it first; to stay out, press No thanks. You can change it later in your Stripe Dashboard.
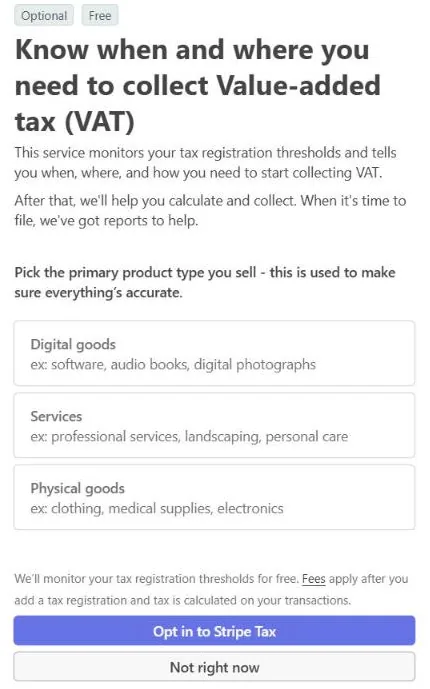
Stripe Tax keeps an eye on your VAT registration thresholds and can work out VAT on your payments. Stripe says the monitoring is free, and fees apply once you add a tax registration and it calculates tax on your payments. It's optional too: Opt in to Stripe Tax or Not right now. Whether you need it depends on your own tax position; an accountant can advise you.
9. Review and submit
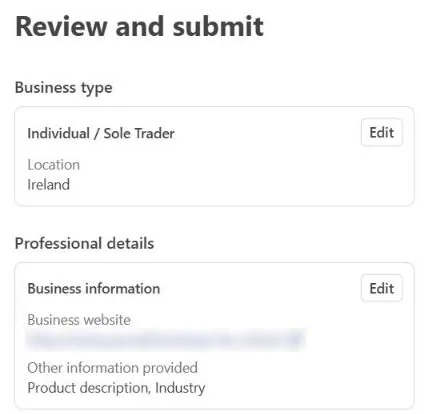
Stripe shows everything in one place. YourADI has filled in some of it for you: the business type, Individual / Sole Trader in Ireland, your YourADI booking page as the business website, and, under Other information provided, your industry and a short description of your business (driving lessons that students book and pay for online through your booking page). Use Edit next to anything that needs changing.
Check the Other details too: your fraud protection level and its price, and whether Tax and Climate are on or off. When everything is right, press Agree and submit. That confirms your details are complete and correct, agrees to Stripe's Connected Account Agreement, linked just above the button, and, as Stripe's page says, agrees to receiving automated text messages.
10. Back in YourADI: Ready
Stripe brings you back to Billing & Payments in YourADI. Once Stripe has checked your details, Payment Setup says Ready: your payment setup is complete and you can take online bookings. Open Stripe Dashboard takes you to your Stripe account, where you can see payments and payouts and change your Stripe settings.
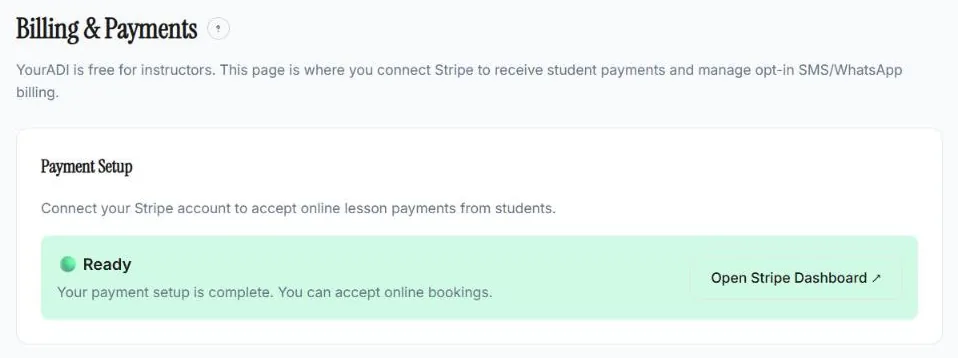
If it says Action needed, Stripe still needs something from you, for example because you stopped part-way: press Complete Requirements to carry on. In progress means Stripe is still checking; Continue Setup takes you back to Stripe if you need it.
From 19 November 2026, the same page will also have a Booking fee card, under Seller details. There you choose whether to add your own booking fee to what students pay online (in a school, it applies to the whole school).